

Boost Productivity with GrabCAD Print Pro 1.107


A free collection of custom GrabCAD Print Pro features, built with the GrabCAD Print SDK, to boost your productivity.
Daily staples and occasional lifesavers - built to make your work smoother.
More API More Power 💪
-
Step 1: Download the plugins
Download the ZIP and read README.md to get started.
Important: These tools require a GrabCAD Print Pro license.
Requirements: GrabCAD Print Pro 1.107 or newer.
Don't have GrabCAD Print Pro yet ? Try it together with these plugins for free for 30 days, by registering here
-
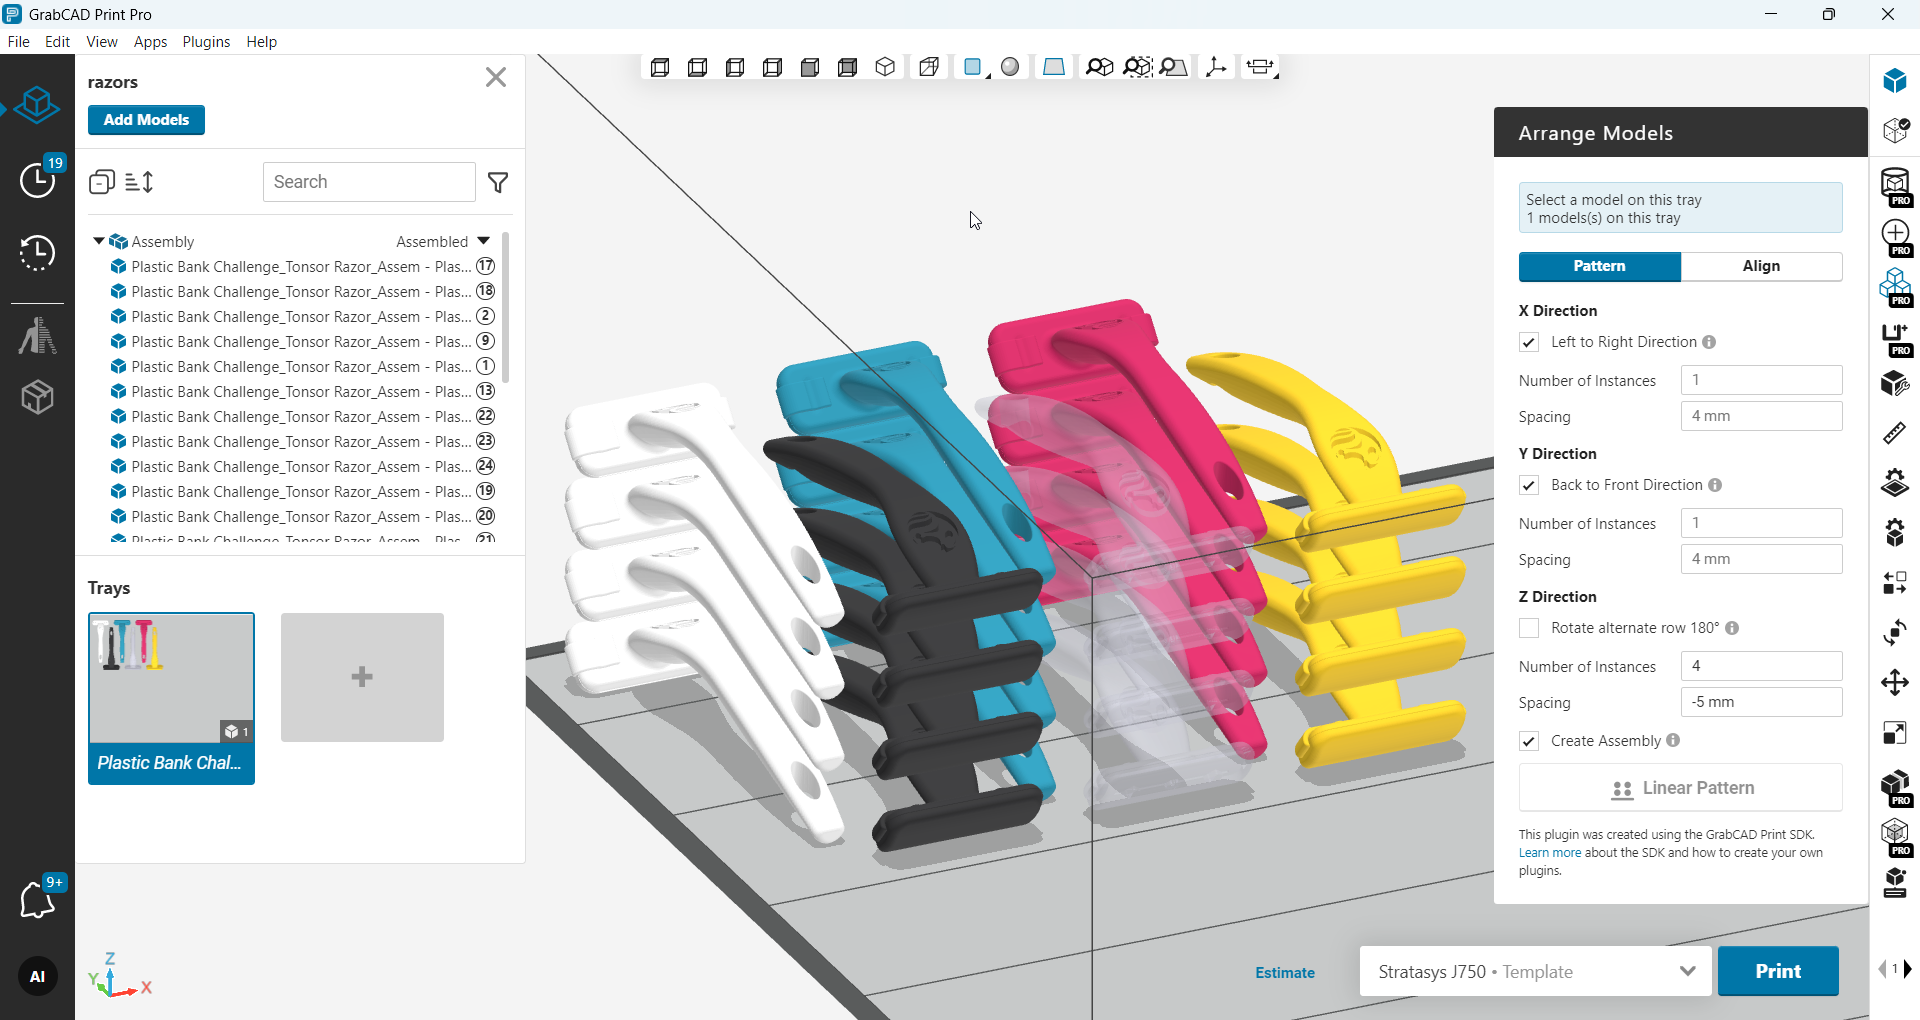
Step 2: Linear Pattern and Smart Alignment
Stack parts on the Z-axis with PolyJet - easier than ever.
Flexible row/column patterns: you can choose to don’t create the assembly yet - tweak positions or orientations as needed. When finished, select all instances and make the assembly, then print. Available for all printer technologies.
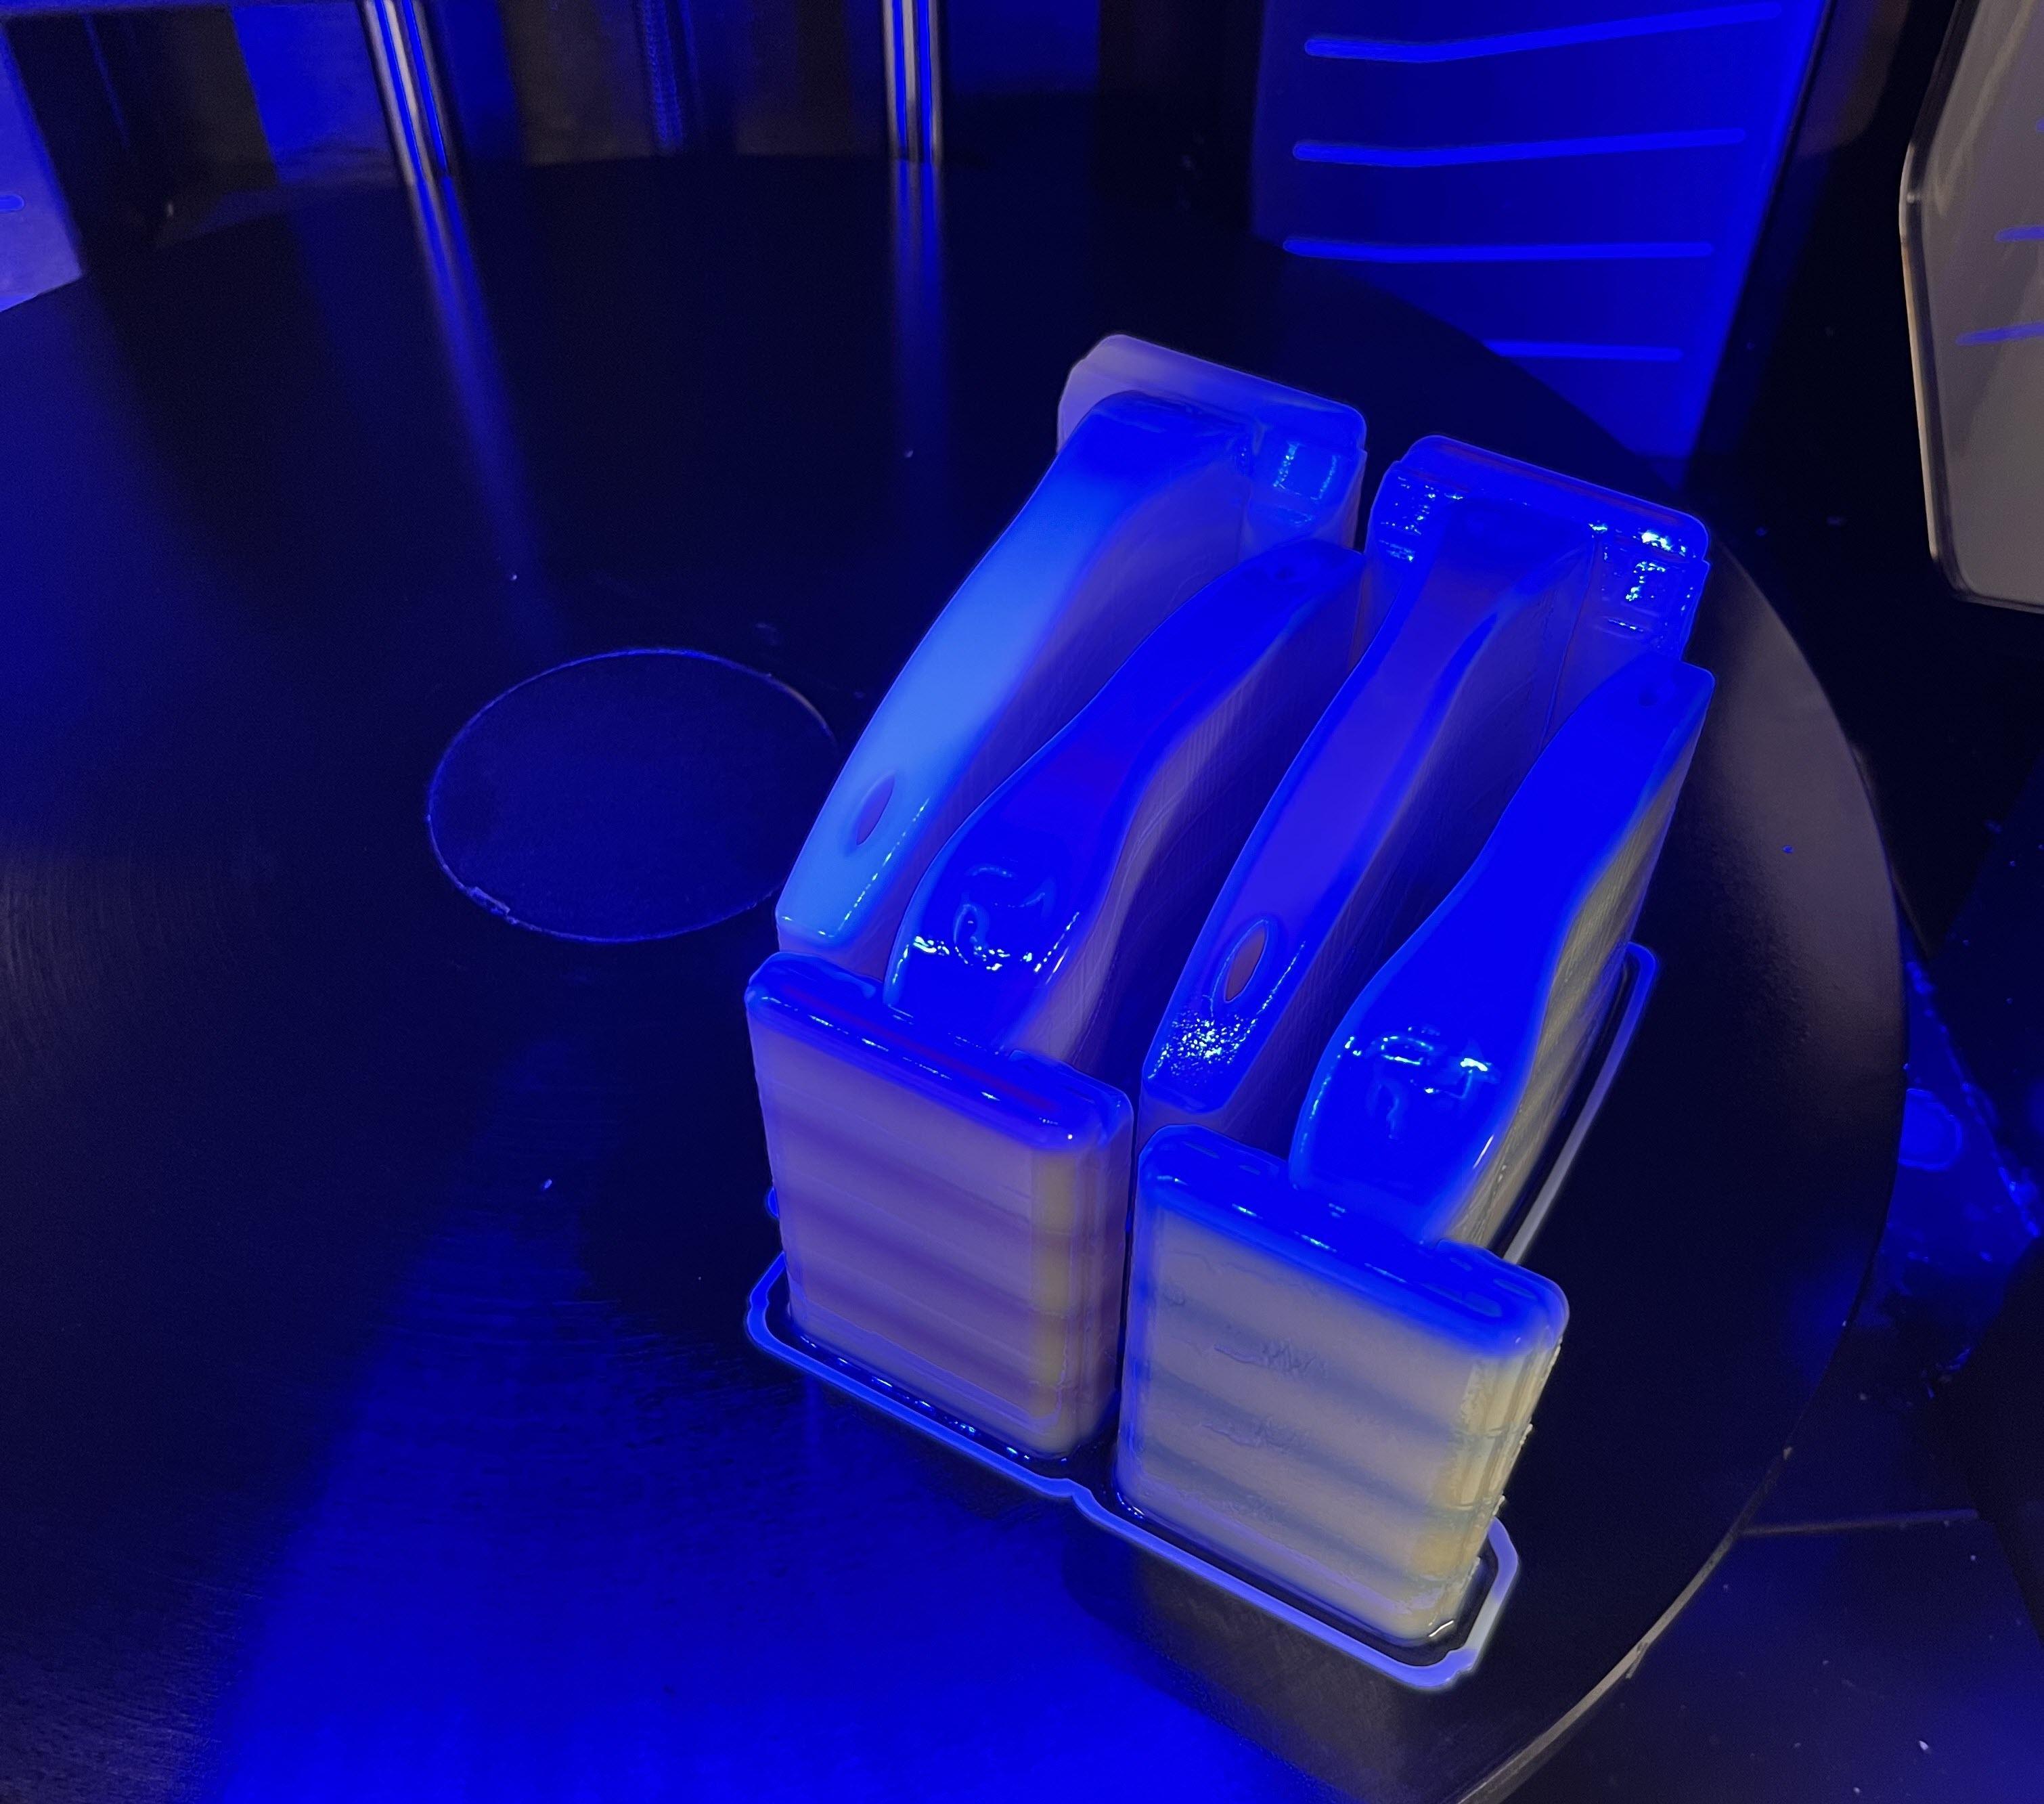
I was curious to see how it is going to be printed with our J55: the support waste is minimal.
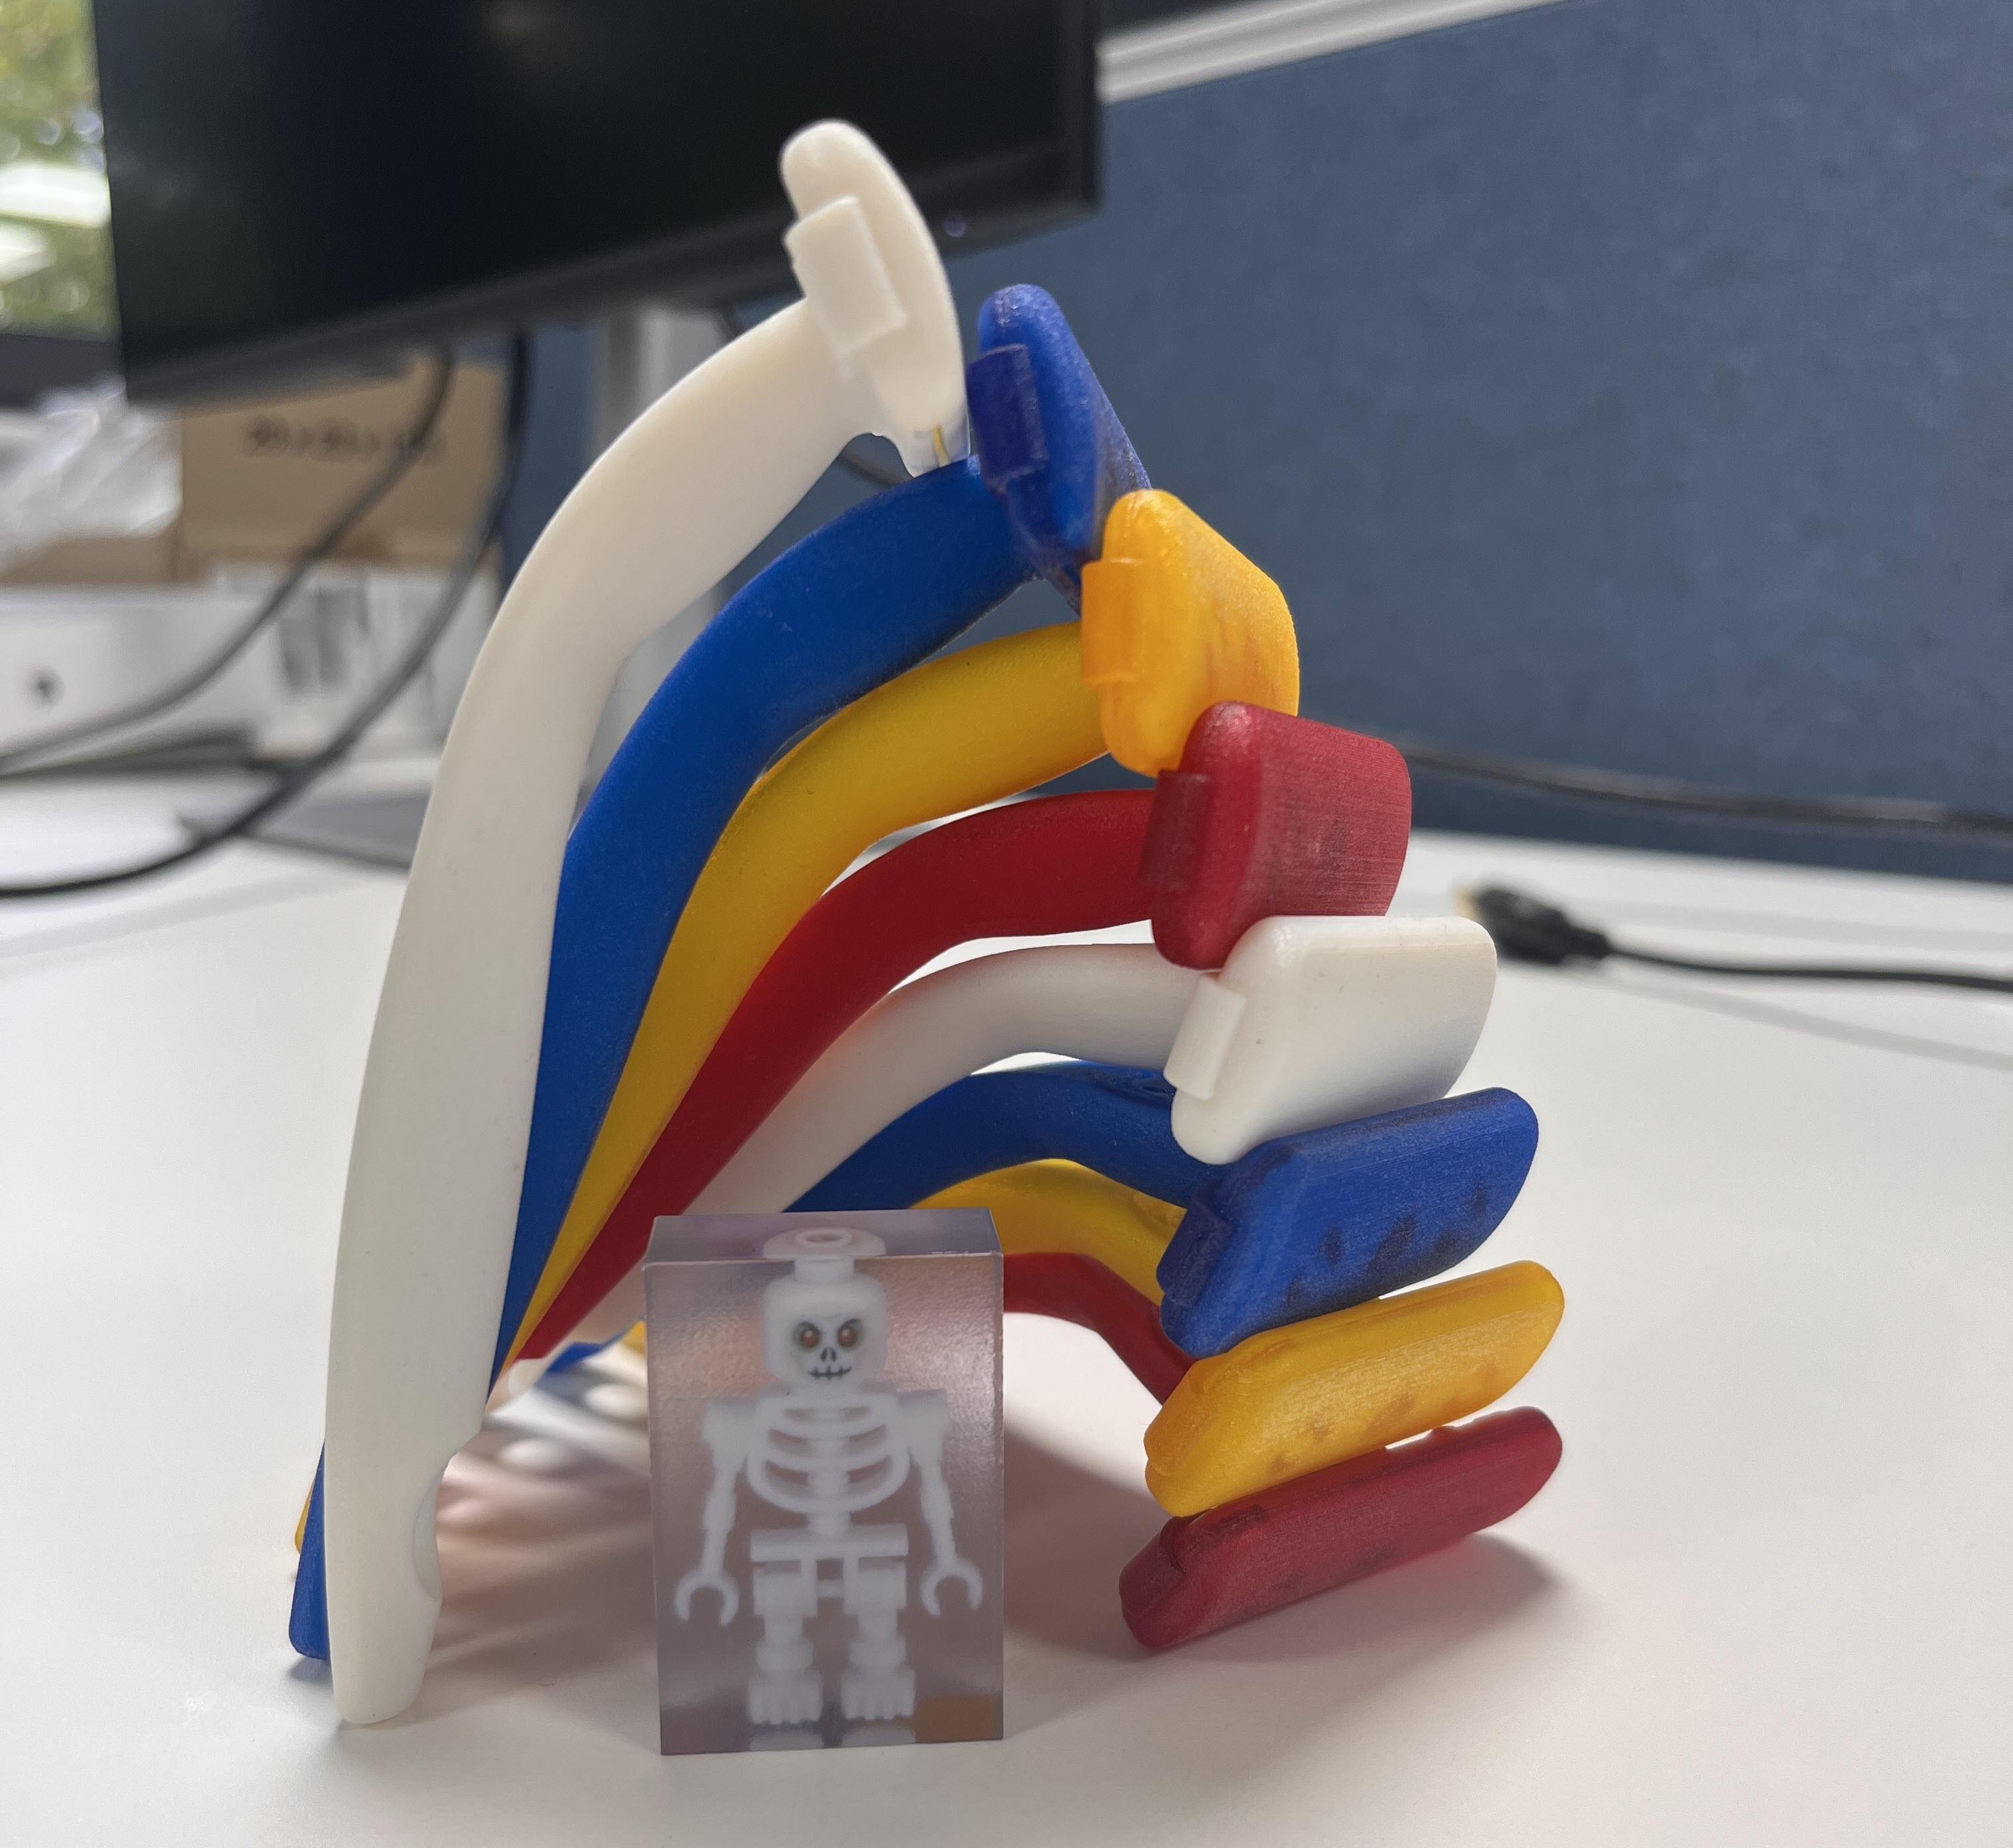
Mission accomplished! Thanks to soluble support material, the next day I was able to stack them on my desk.
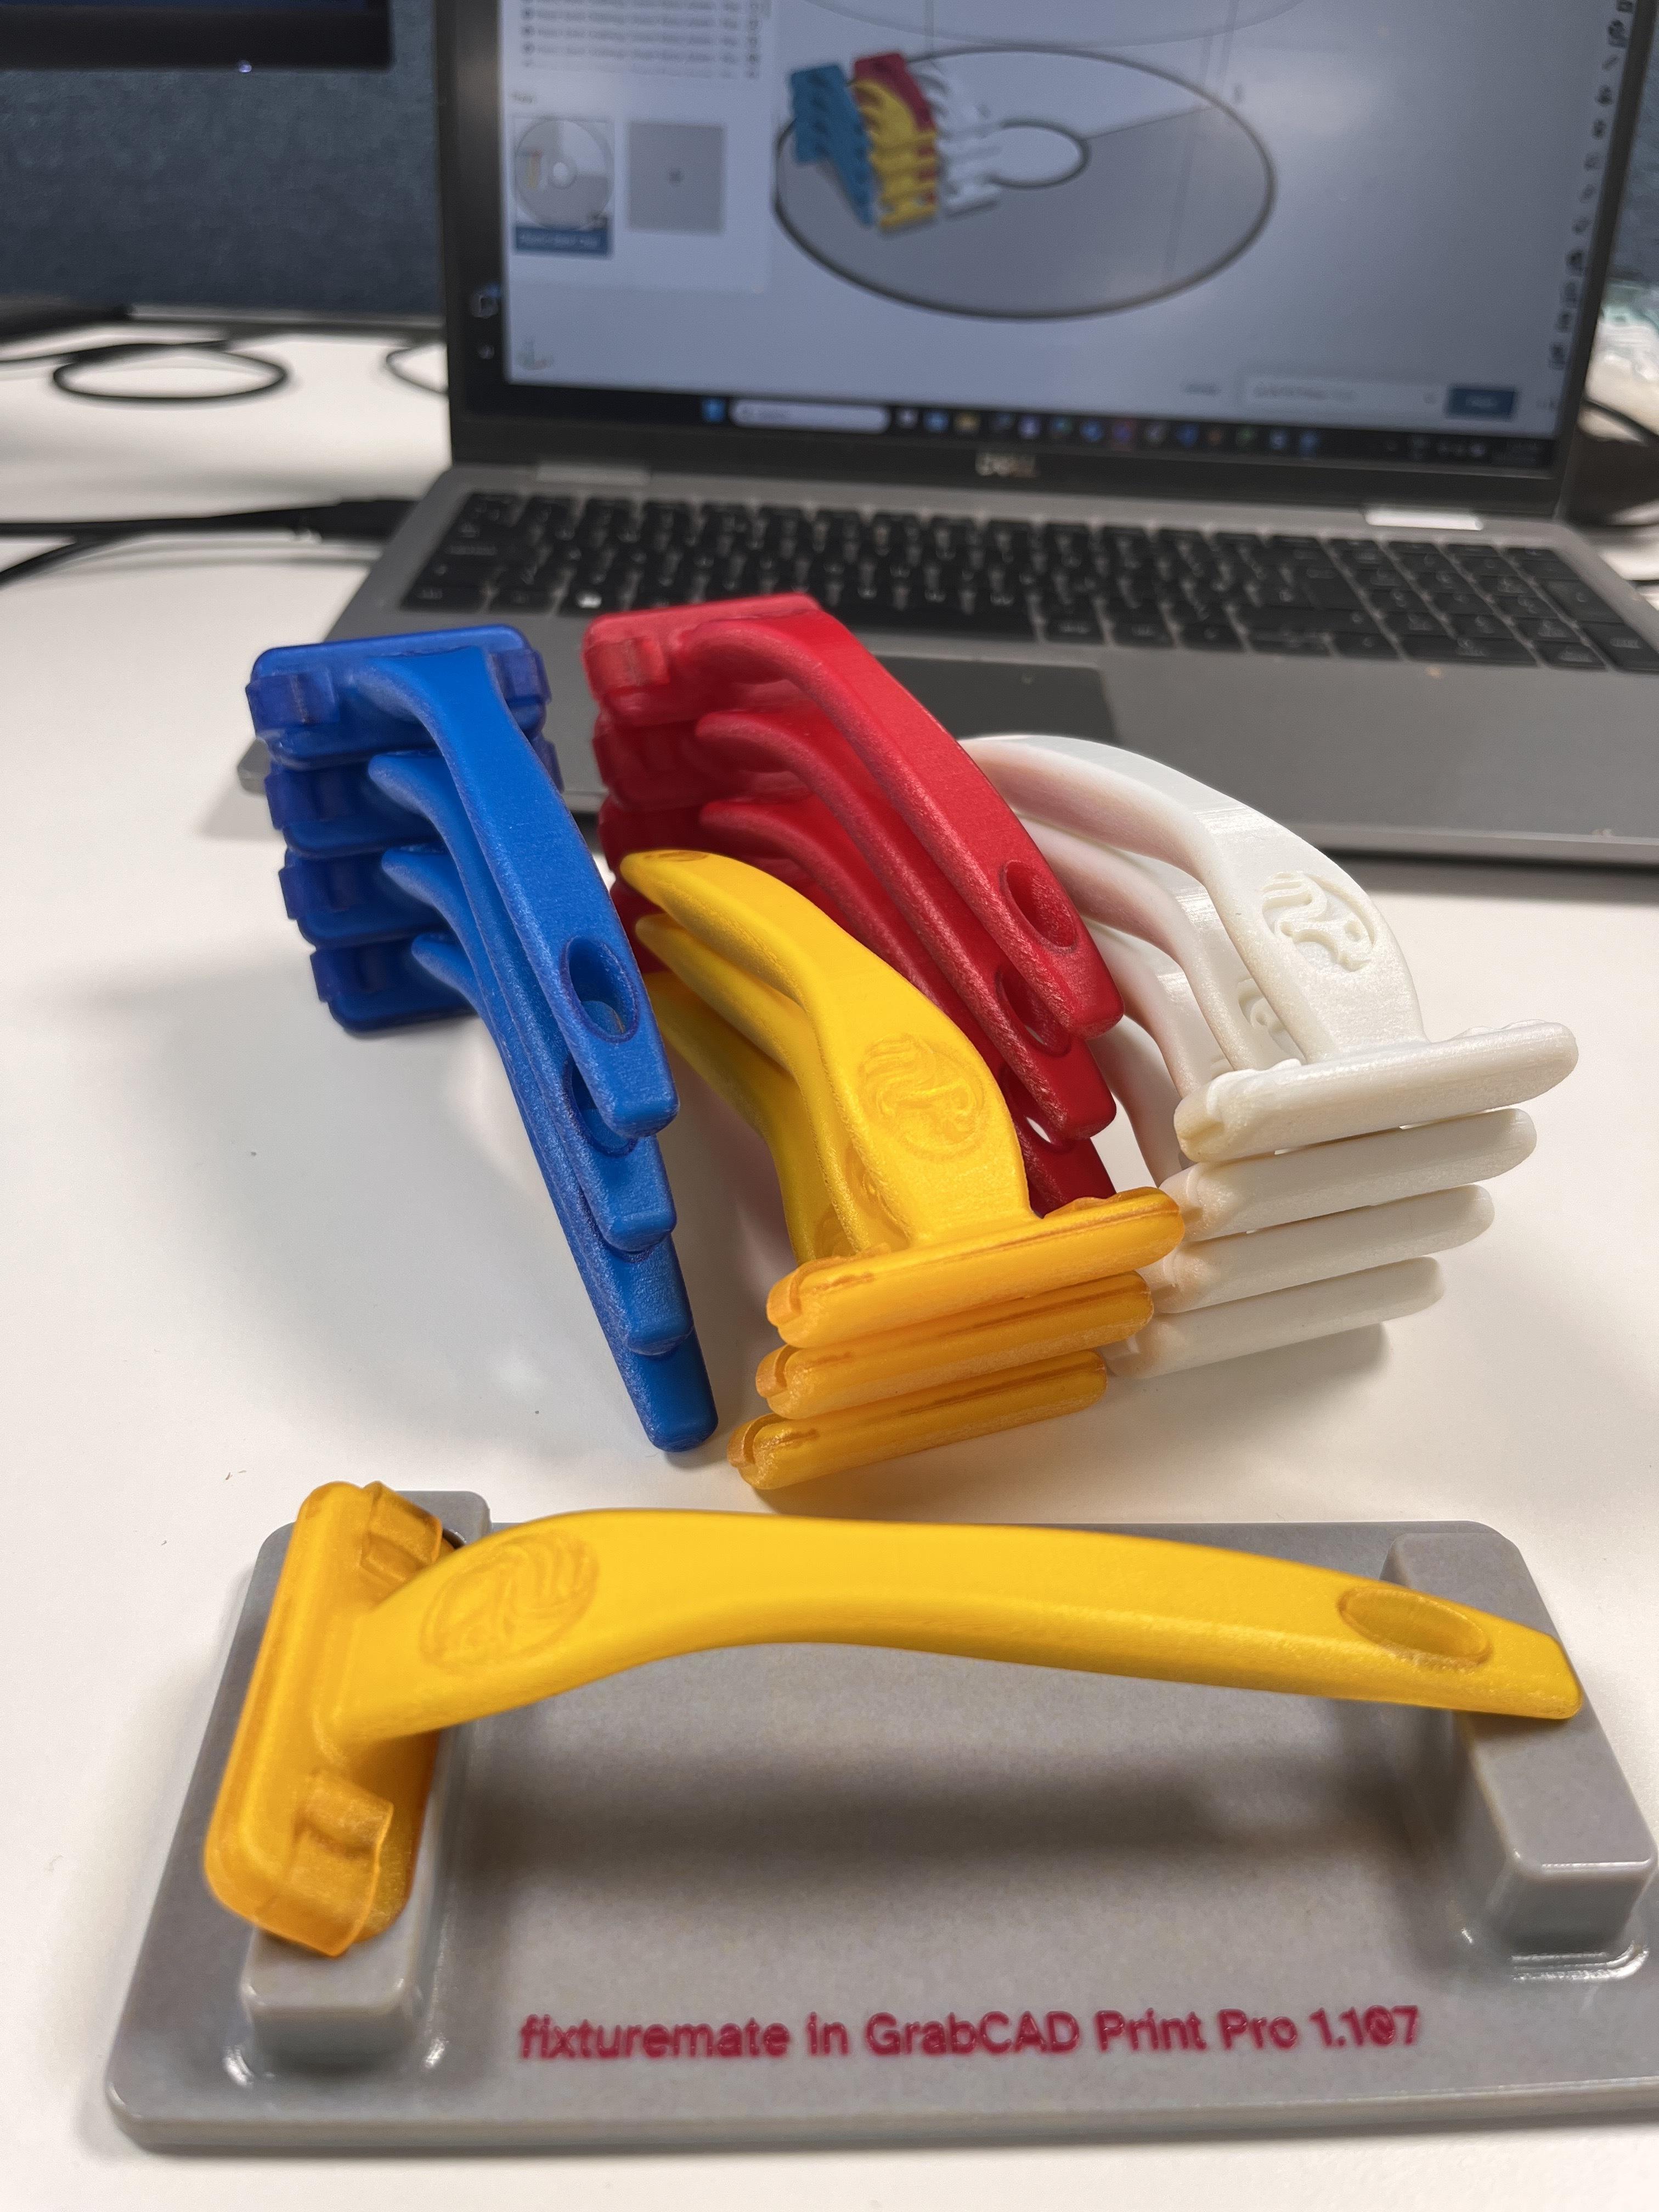
And of course, using fixturemate to create a support in less than 2 minutes.
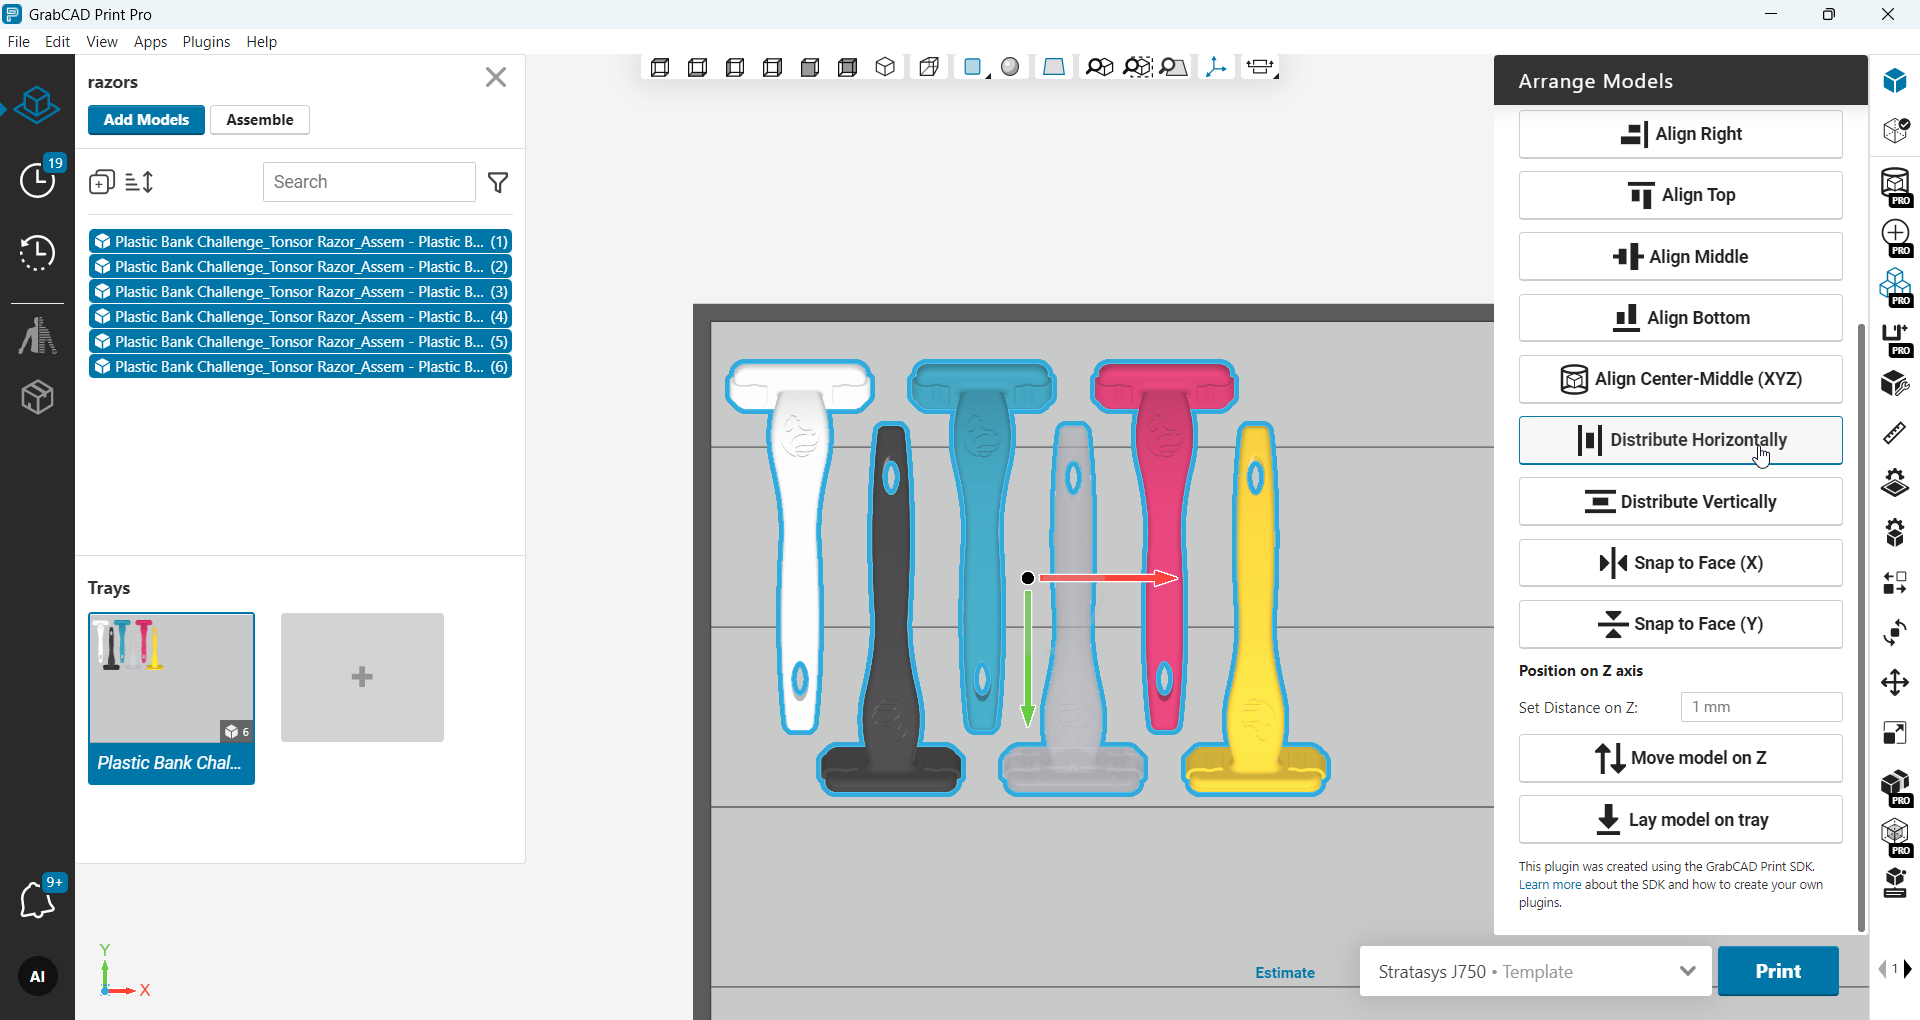
Align Models - precise, fast layout on the tray
Use these commands to line up selected models using their bounding boxes. Select two or more models, then choose an action. The first selected model becomes the anchor (stays put), all others move to match it.
Edge alignment
- Align Left / Right / Top / Bottom – Snaps the outer edges of all selected models to the anchor’s corresponding edge on the tray plane (X–Y). Great for making shared edges perfectly flush.
- Align Middle (X / Y) – Centers all selected models to the anchor along the chosen axis while keeping their other coordinates unchanged.
- Align Center–Middle (X Y Z) – Centers every selected model to the anchor in all three axes (X, Y, and Z). Useful when parts must share the same centroid.
Even spacing
- Distribute Horizontally / Vertically – Spreads models evenly between the left–right or top–bottom extremes of the selection. End models stay put; inner models are re-spaced.
Face-based alignment
- Snap to Face (X / Y) – Picks the nearest face on each model and aligns it to the anchor along the chosen axis, respecting current rotation. Handy for complex shapes where a flat face (not the full bounding box) should define alignment.
Z positioning
- Move model on Z – Sets the selected models’ Z position (height) by a precise distance. Use this to lift parts off fixtures or seat them on a jig.
- Lay model on tray – Orients and drops models so their lowest stable face rests on the tray (auto “lay flat”).
Before you print, make sure everything is in the right place.
-
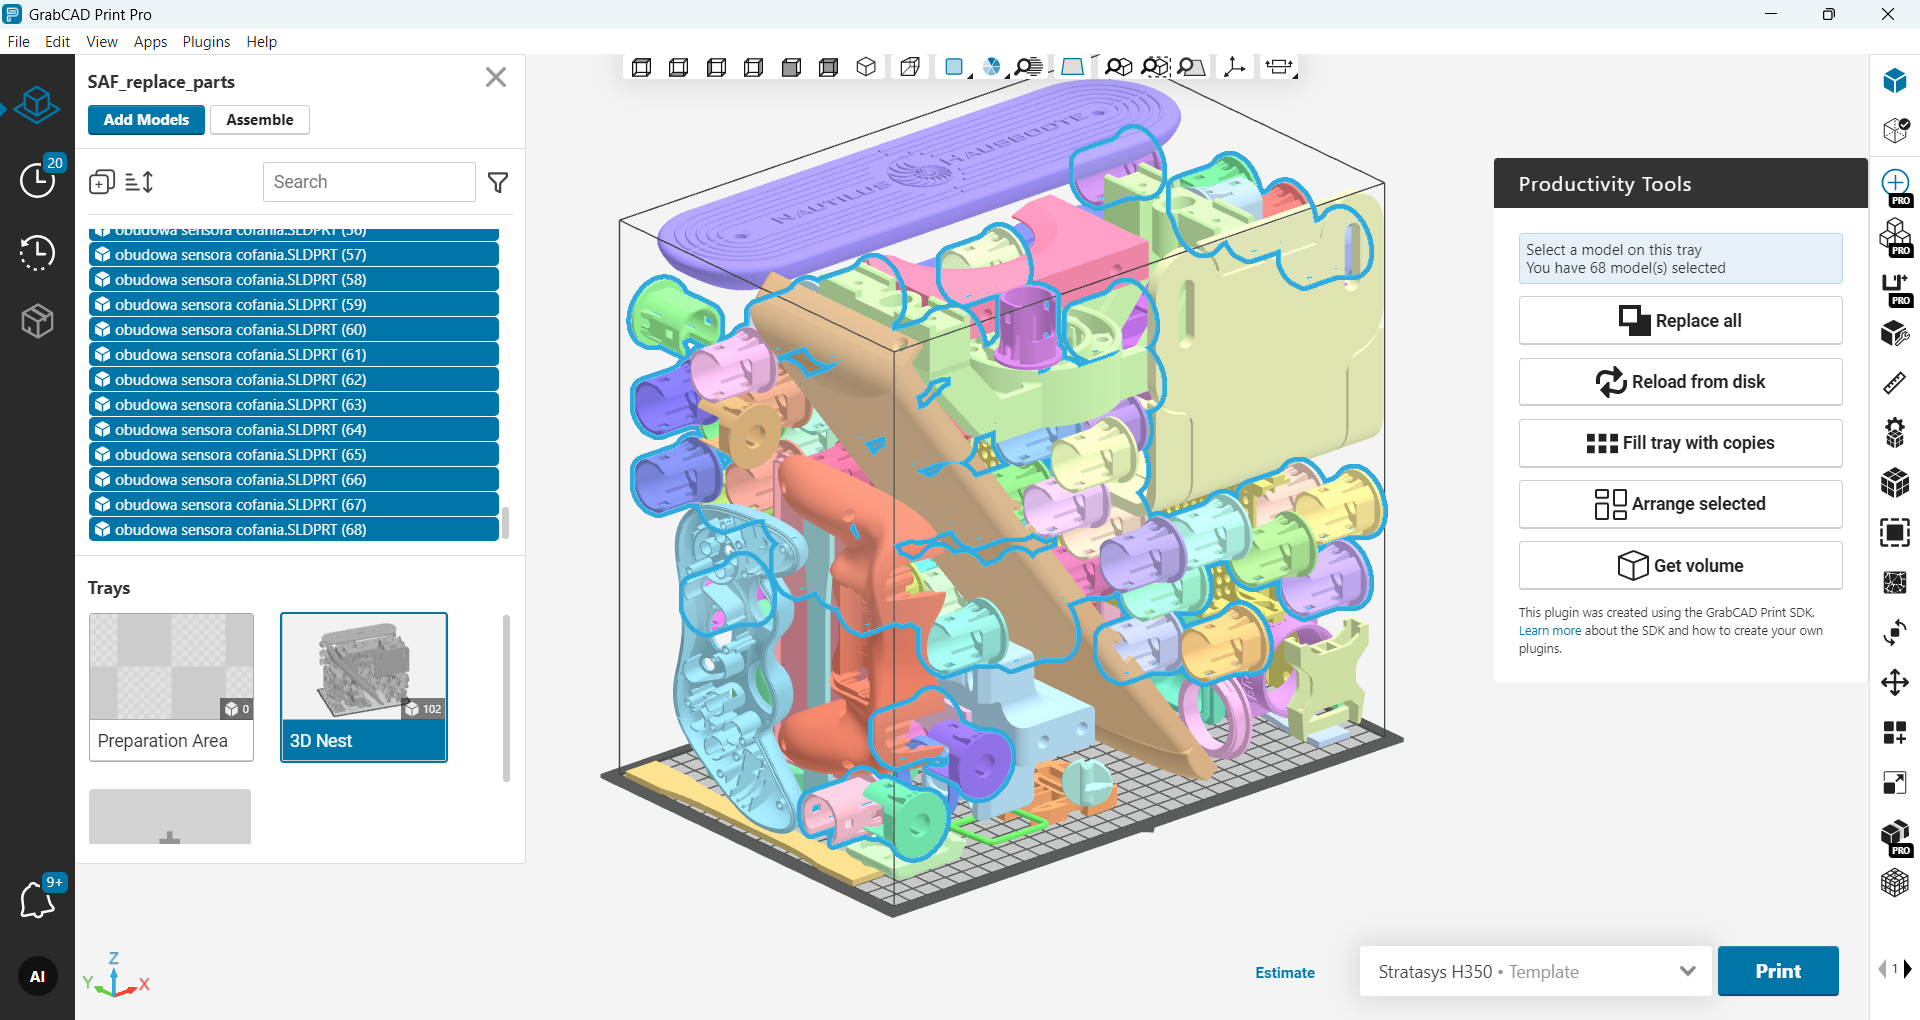
Step 3: Productivity Tools
Replace All and Reload from Disk - no more rebuilding trays when a model updates.
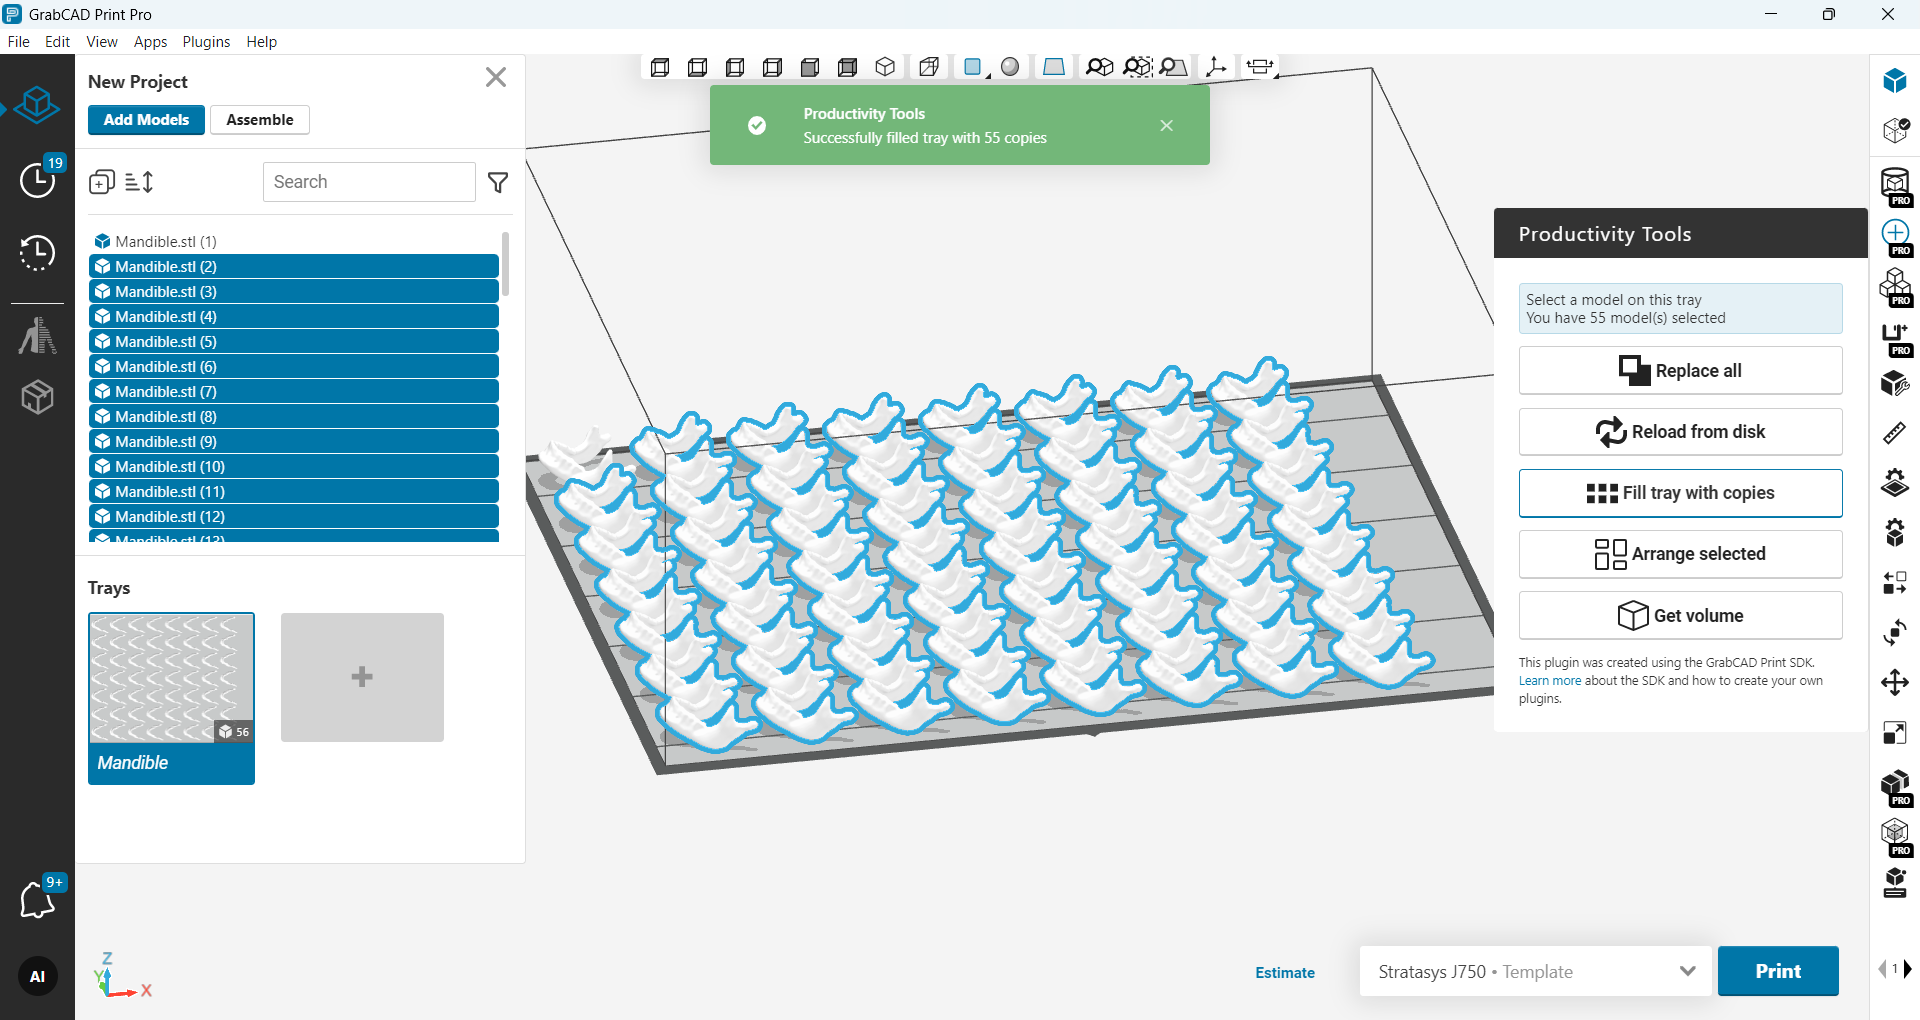
Fill entire tray with single click: insert model > hit Fill Tray with Copies > hit Print. Easy peasy lemon squeezy 👌🍋
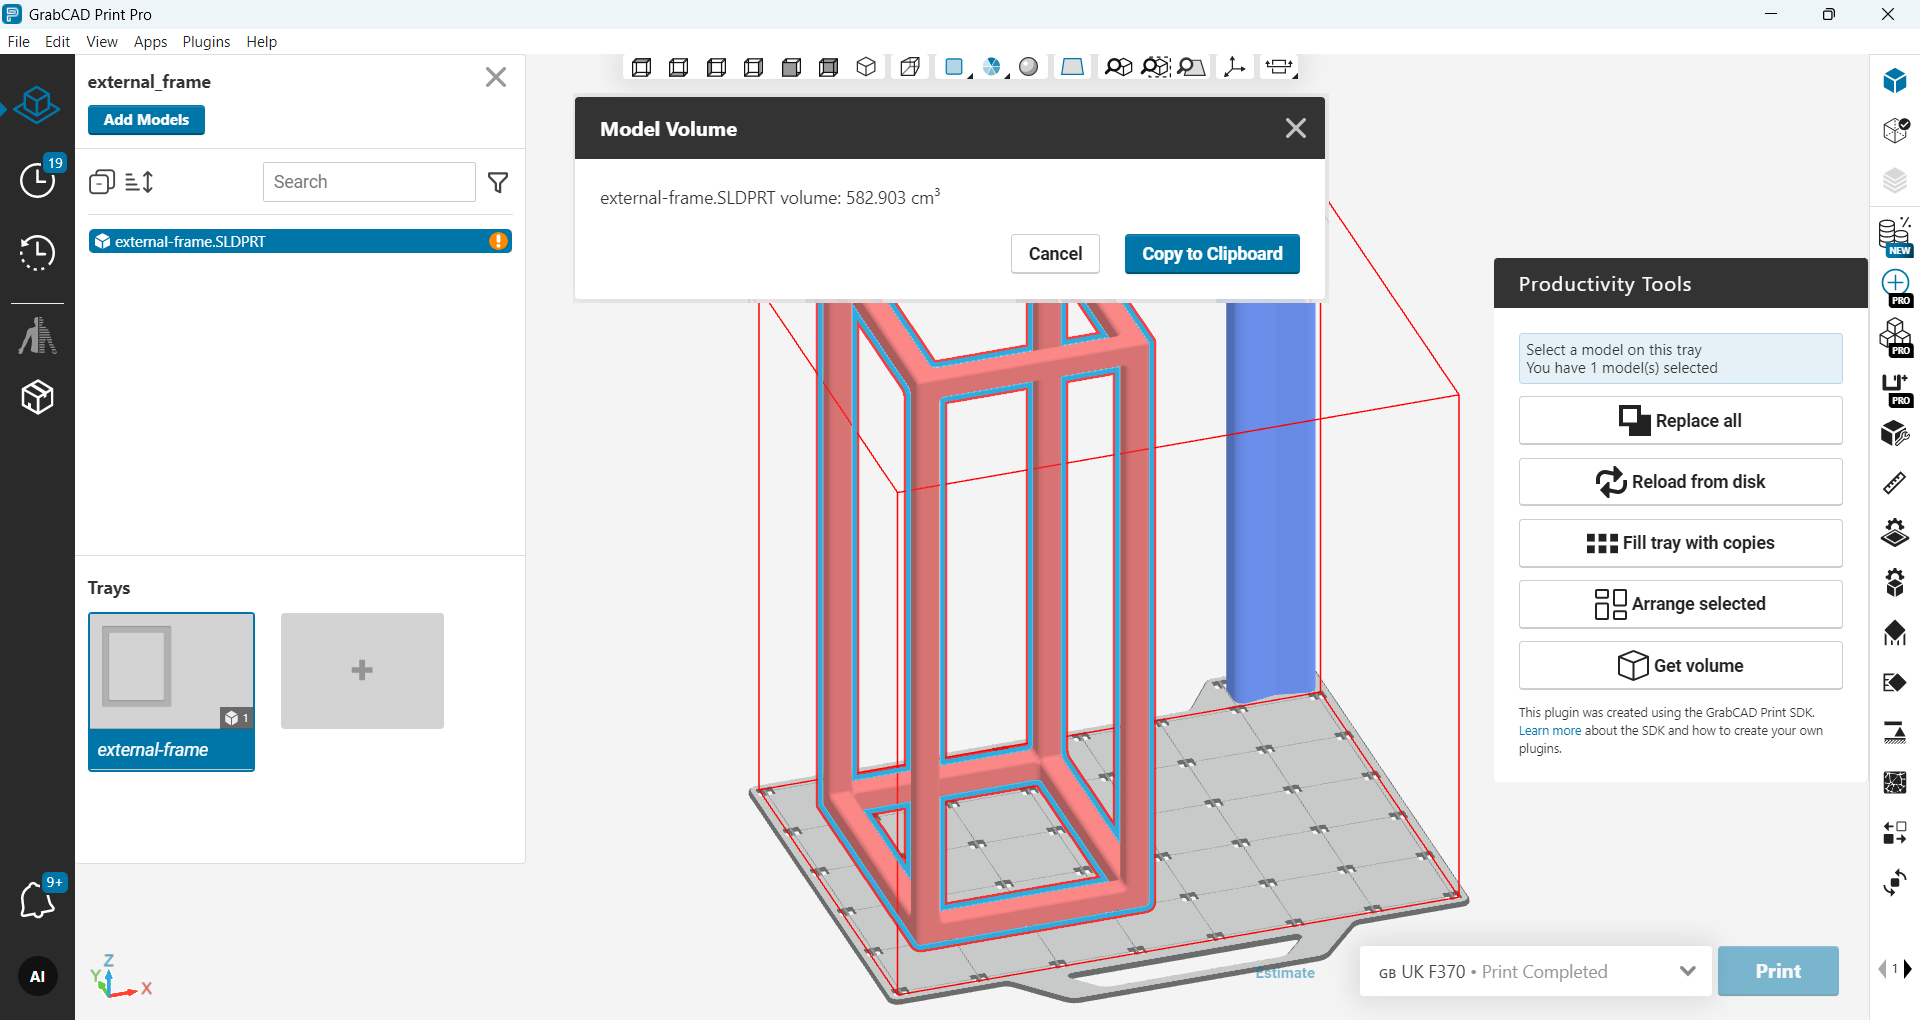
Do you need to know the model volume before you split large model? Now you have a simple way to get it: hit Get Volume button ✅
-
Step 4: Encase in a Clear Block (PolyJet Only)
This one’s my favorite ✨: encase small or fragile parts in a clear block and print a sturdy display piece.
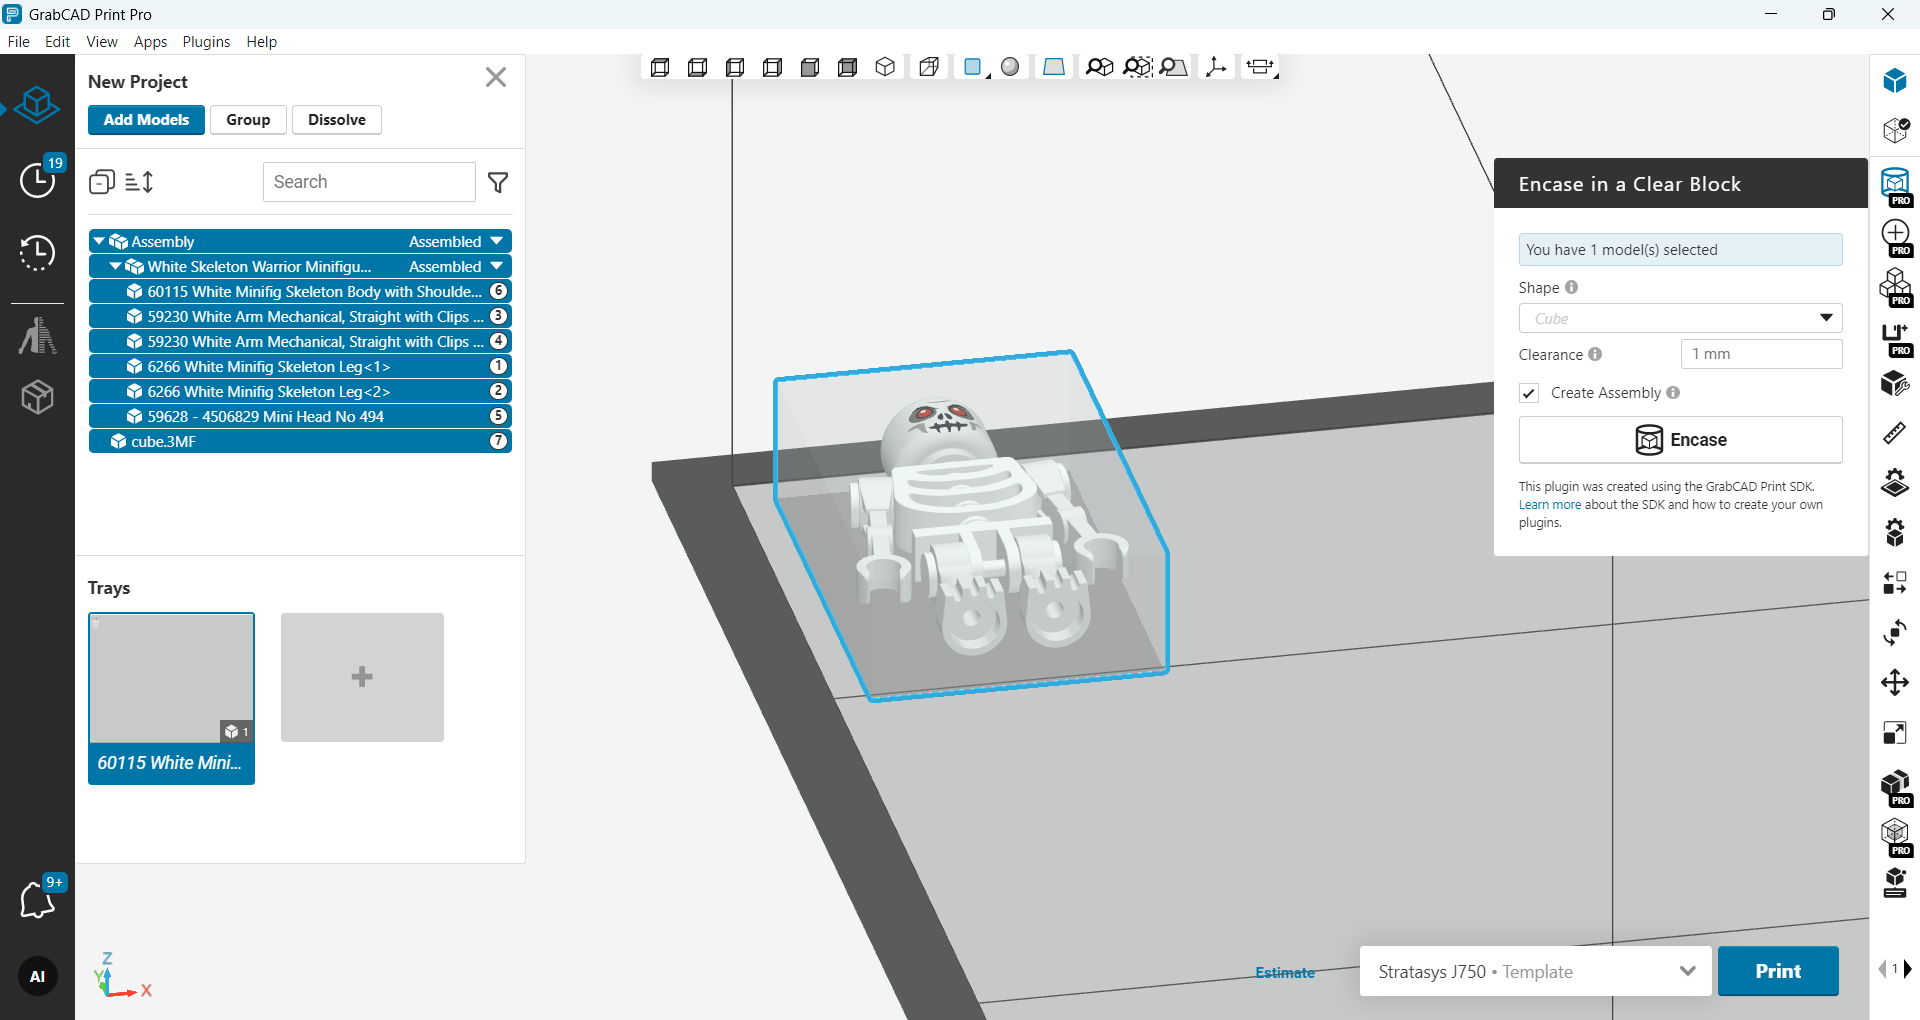
Please make sure Clear material is loaded into the printer tray settings.
You can combine it with the other Productivity Tools and in the end you can create something really interesting:
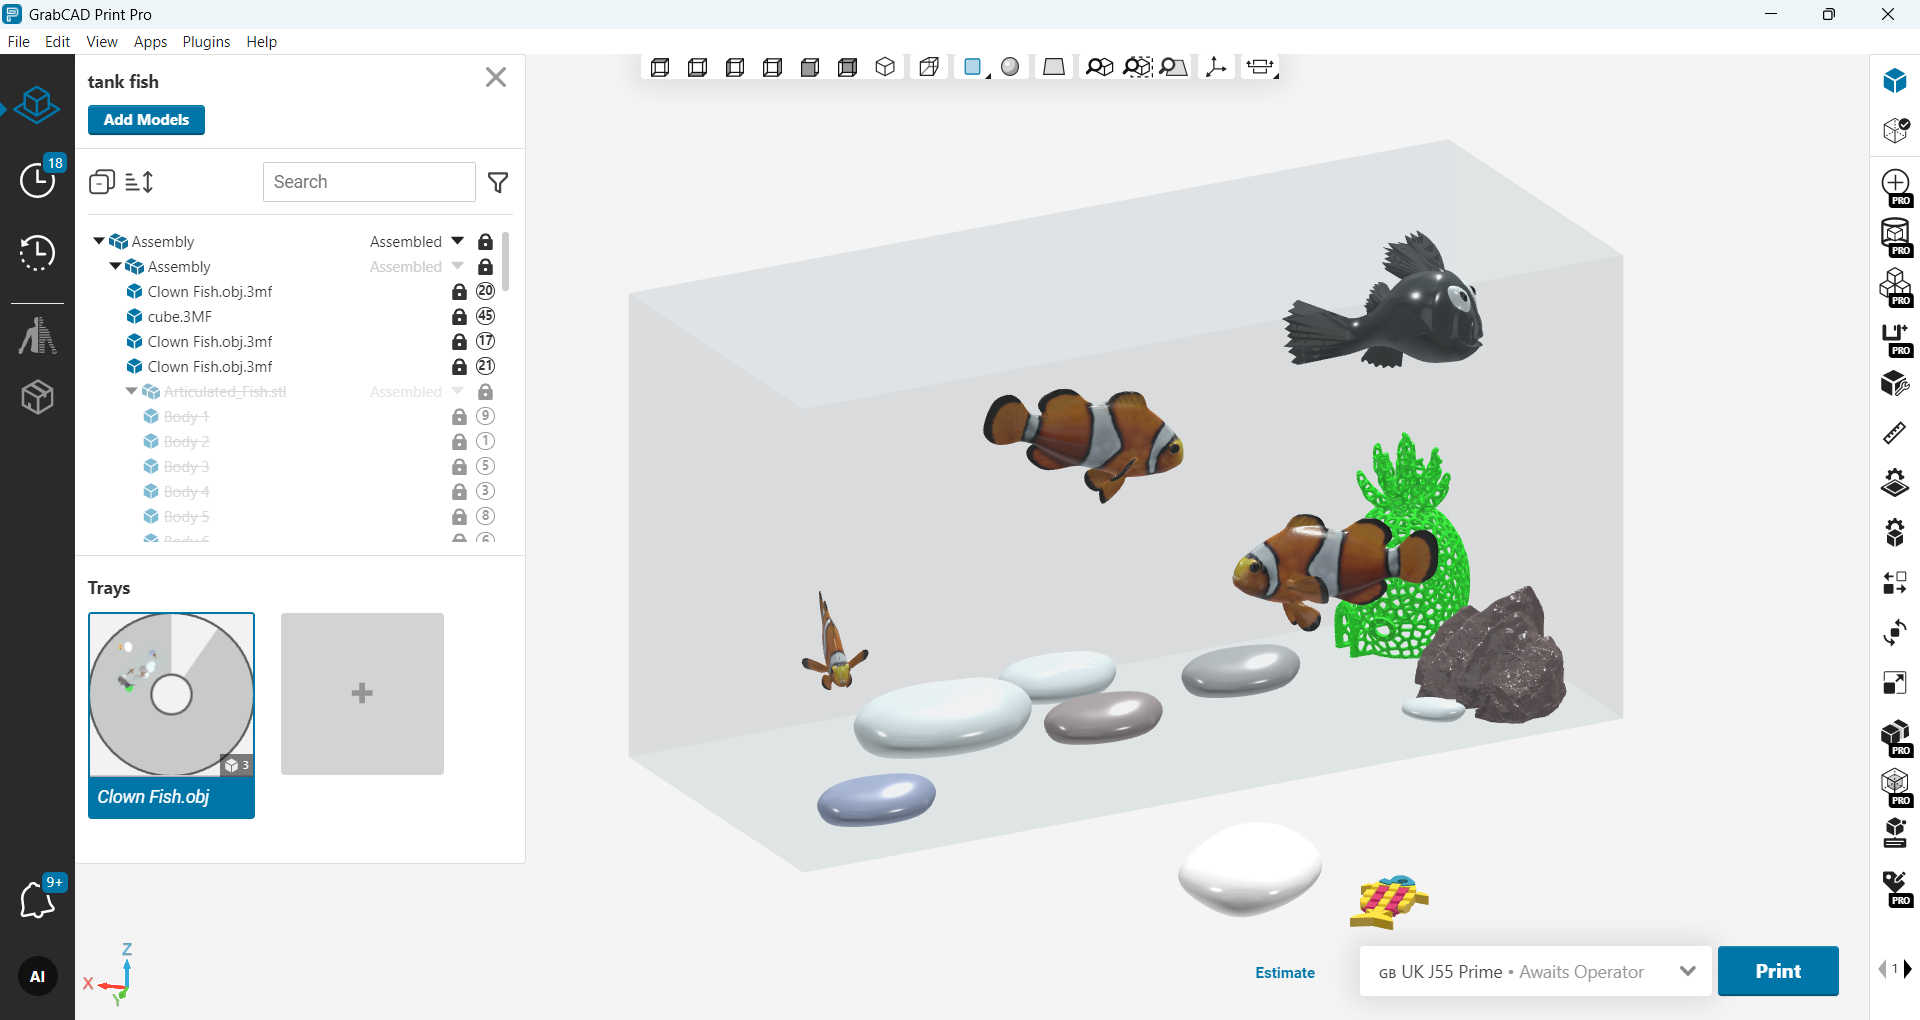
(This is still a work-in-progress project 😊)
-
Step 5: Custom per-part estimate (FDM only)
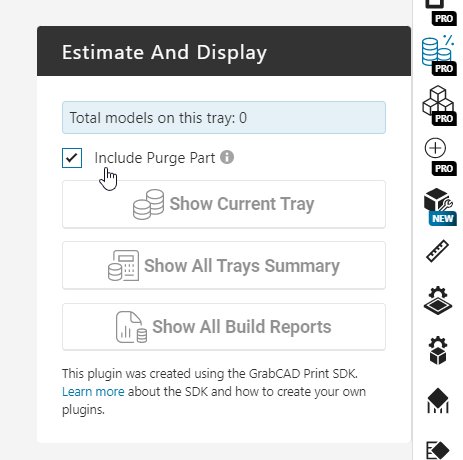
Generate FDM per-part estimates with custom columns and copy values into clipboard (FDM Only).

Need to save results to an external .xlsx file? Want to add more parameters to your cost calculation? Tell me what you have in mind and I’ll try to make it happen.
UPDATE: new version include Per-Part Estimates for Multiple Trays, with flexible option to include (or not) the Purge Part.
-
Step 6: Final thoughts
Have other ideas? I’m happy to help - feel free to send your request to developers@grabcad.com or share your thoughts in a comment.
I hope many of these plugins become built-in GrabCAD Print Pro features over time. Until then, please feel free to use and share them with others.
Special thanks to David McLean for his generous help along the way.